Mobee AppExchange Installation Guide
Salesforce AppExchange Package
To install the Mobee App Package from the AppExchange, follow the steps below:
1. Navigate to Mobee App Page:
Launch your web browser.
Access the Mobee App page on AppExchange using the following link: Mobee App on AppExchange.
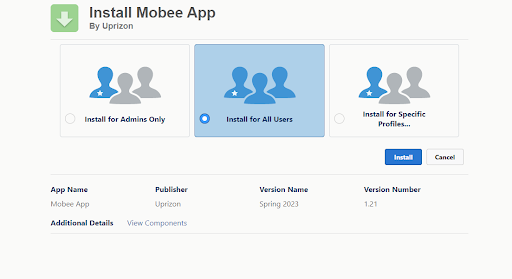
2. Install the Package:
- Click on the "Get It Now" button.
- Choose the Salesforce org where you'd like to install the package.
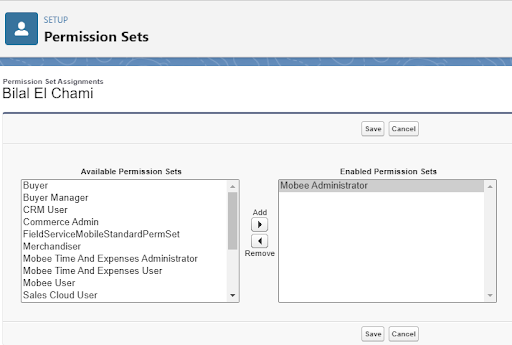
3. User Management & Permission Assignment:
Navigate to the user management page in Salesforce.
Select a user.
Assign the required permissions based on your operational requirements (options include: Mobee Administrator, Mobee User, Mobee Community Administrator, Mobee Community User, Mobee Time And Expenses Administrator, Mobee Time And Expenses User).
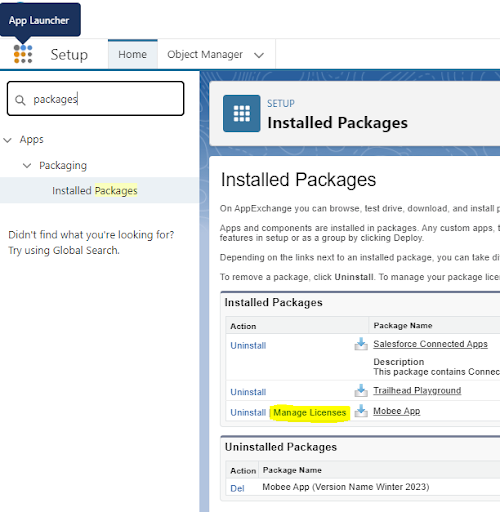
4. License Management:
Go to the Setup Page.
Access the “Installed Packages” section.
Click on the “Manage Licenses” link adjacent to the Mobee Package. This is where you can allocate licenses to specific users.
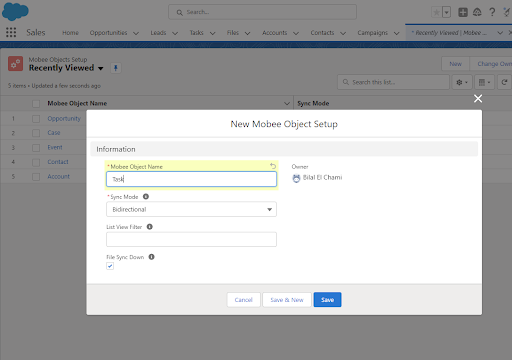
5. Mobee Object Setup:
- If you're a Mobee Administrator user, head over to the “Mobee Object Setup” tab.
- This tab is crucial for determining the objects that will synchronize with the mobile app.
6. Define Synchronization Settings:
Input the Object API Name.
Adjust the settings as per your requirements.
7. Finalizing the Setup:
- Upon finalizing your synchronization objects, users granted the correct permissions can now download and utilize the mobile application on both iOS and Android platforms.