Time Sheet Approval Process
Introduction
You can add an approval process to have your manager, or a designated approver, review and approve or reject your submitted time entries.

Approval Process Activation
1. Create The Approval Process
The following section is a step-by-step guide for creating a standard approval process, where some actions are mandatory and others are optional. (The mandatory steps are highlighted in bold)
- Go to the setup page
- Access the approval processes
- Manage approval processes for: time period
- Create new approval process: use standard setup wizard

Step 1: Enter Name And Description

Step 2: Specify Entry Criteria
No Action To Do

Step 3: Specify Approver FielD And Record Editability Properties
Specify Approver Field (for automated approval routing) Select: Manager This step is important only if you wish to designate the manager as the approver (after completing the approval process creation)
Record Editability Select: Administrators or the currently assigned approver can edit records during the approval process.

Step 4: Select Notification Templates
No Action To Do

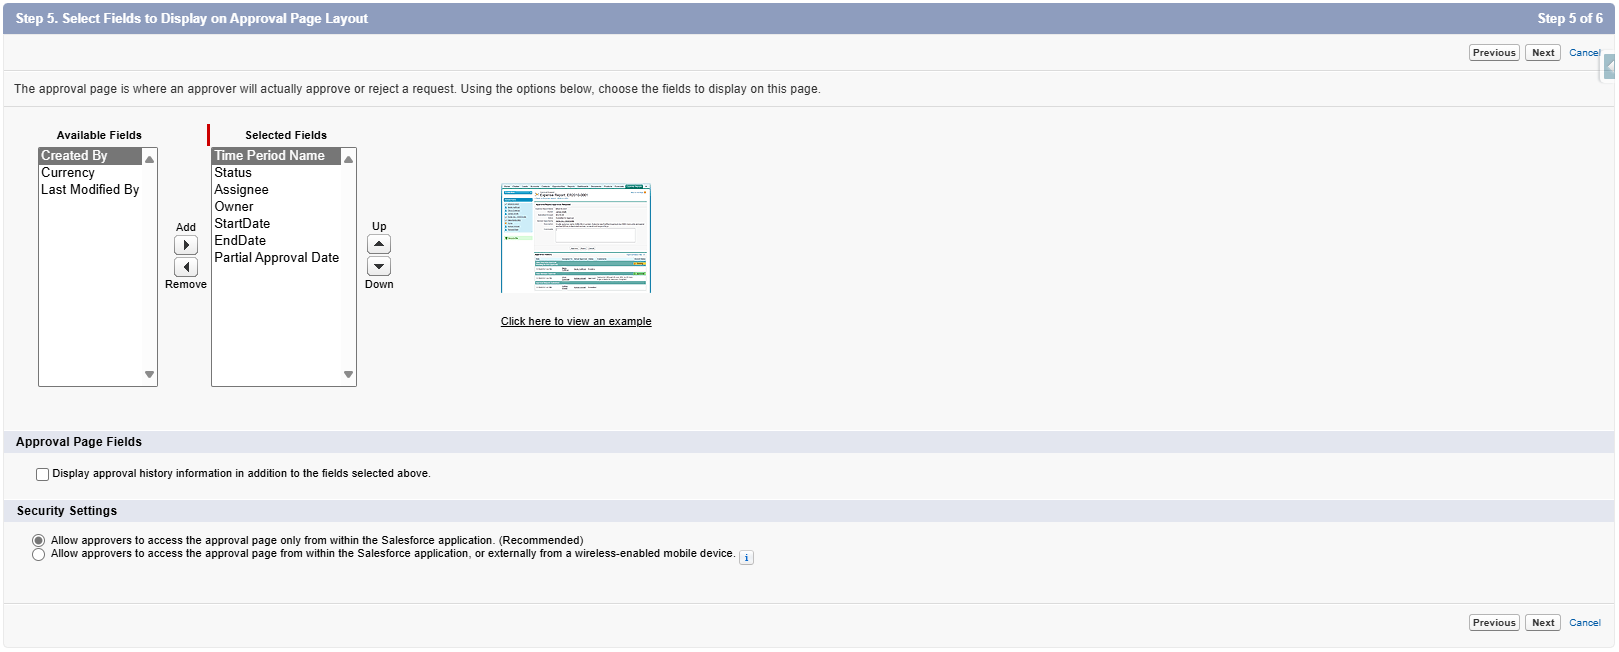
Step 5: Select Fields To Display On Approval Page Layout
No Action To Do

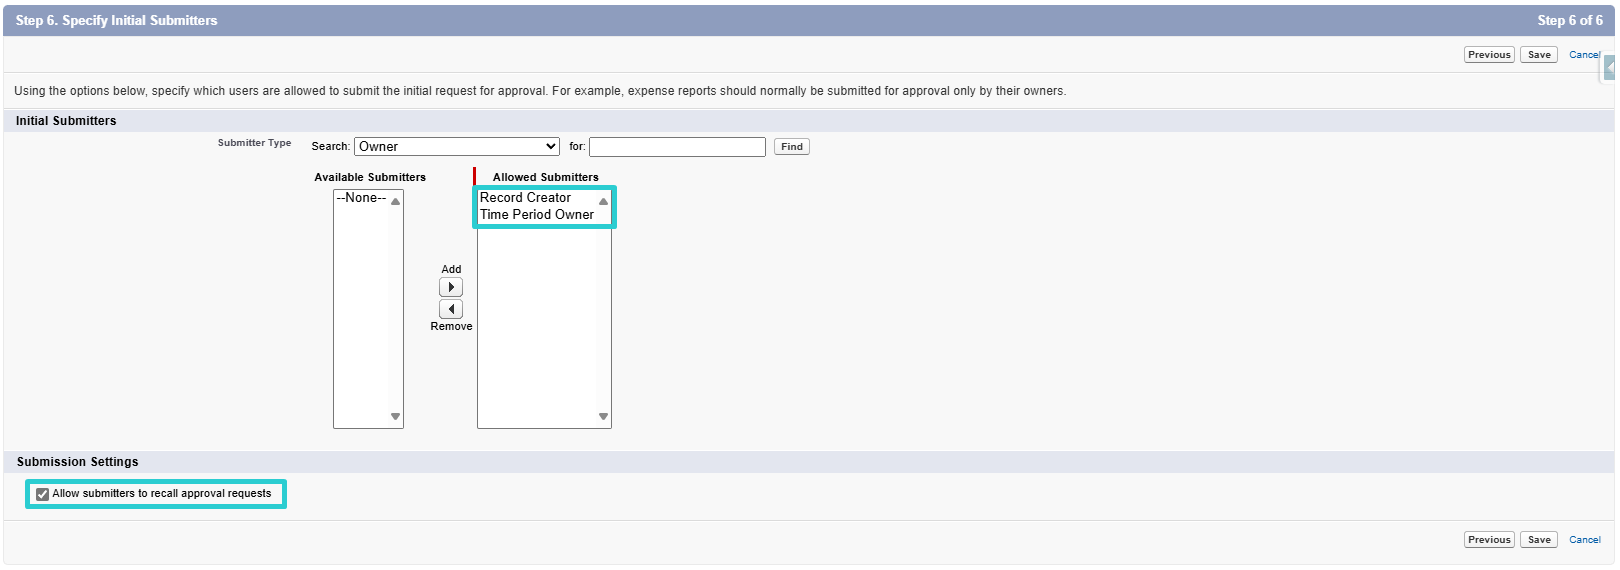
Step 6: Specify Initial Submitters
Initial submitters
Select: Time period owner, record creatorSubmission settings
Select: Allow submitters to recall approval requests

2. Manage The Approval Process
After completing the creation of the approval process, you will be able to manage actions (initial submission, final approval, final rejection, and recall).
These actions must be included for the approval process to function as intended.

2.1. Initial Submission Actions
- Add existing
- Add: Field Update: Update Status to Submitted


2.2. Final Approval Actions
- Edit record lock and select: Unlock record for editing
- Add existing and add: Field Update: Update Status to Approved


2.3. Final Rejection Actions
- Add existing
- Add:
a. Field Update: Update Status to Rejected
b. Email alert: Send Email Notification to Assignee on Rejection (this is an email alert sent to the timesheet submitter if their timesheet is rejected by the approver. if not needed, this email alert should not be added)


2.4. Recall Actions
- Add existing
- Add: Field Update: Update Status to Draft


3. Choose The Approver
3.1. Assign The Approver On The Approval Process
The approver may be the submitter's manager or a specific user responsible for all submitters, such as the hr manager, ensuring that all timesheets are directed to one individual for approval. This is also controlled at the level of the approval process after its creation.


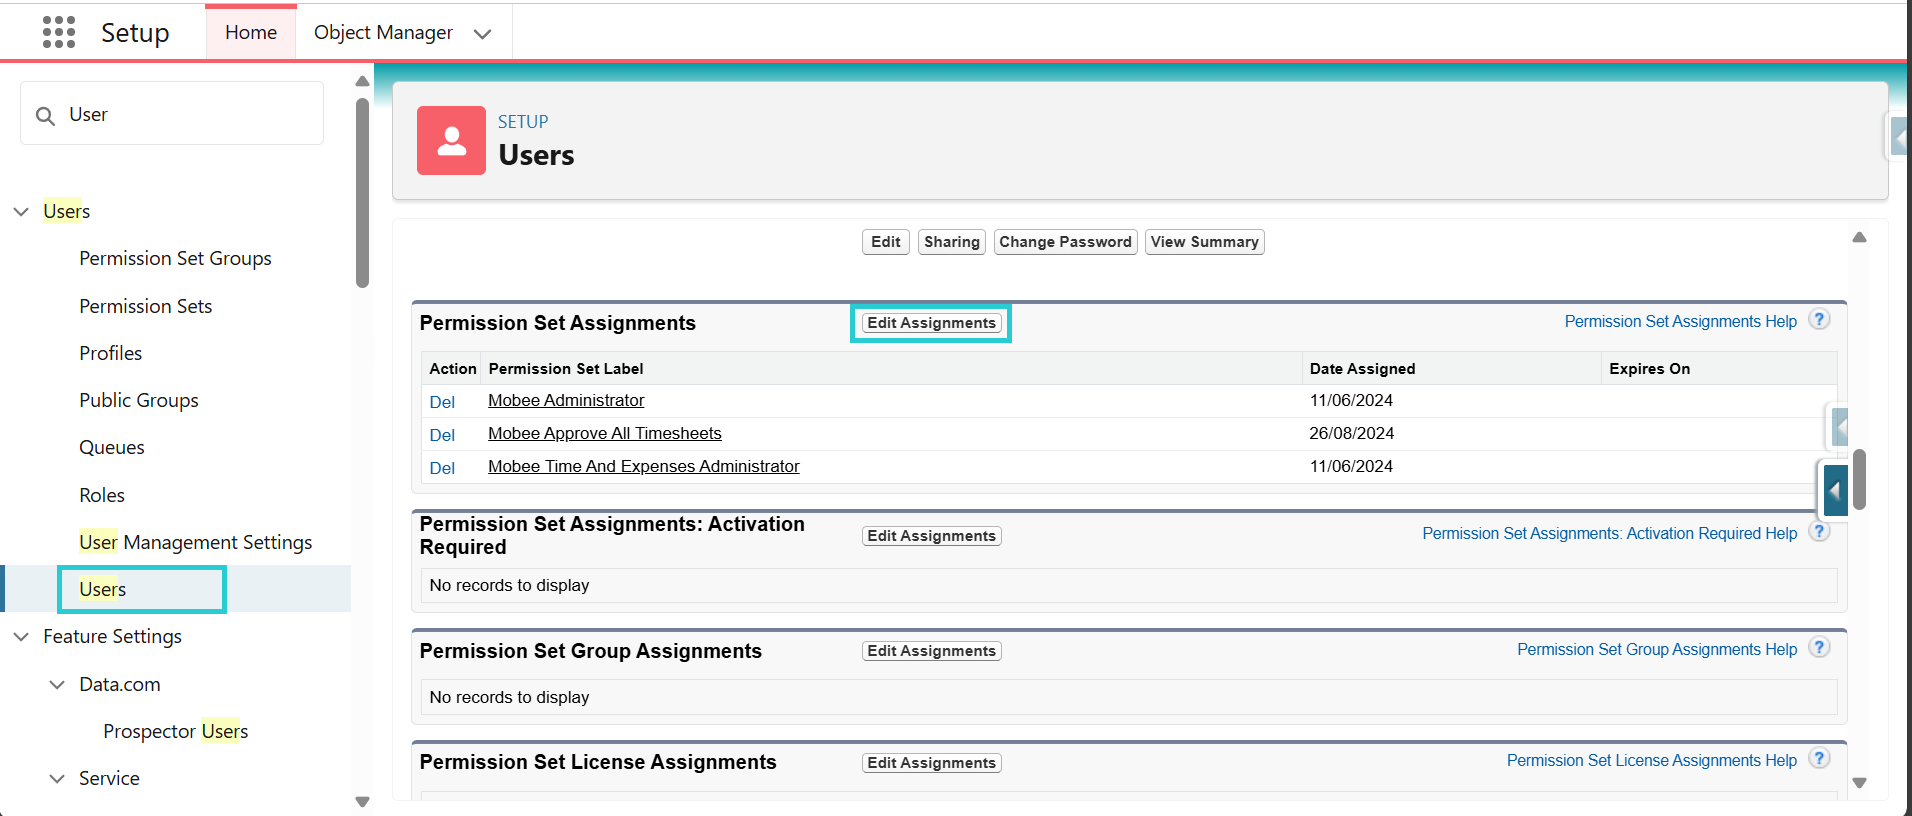
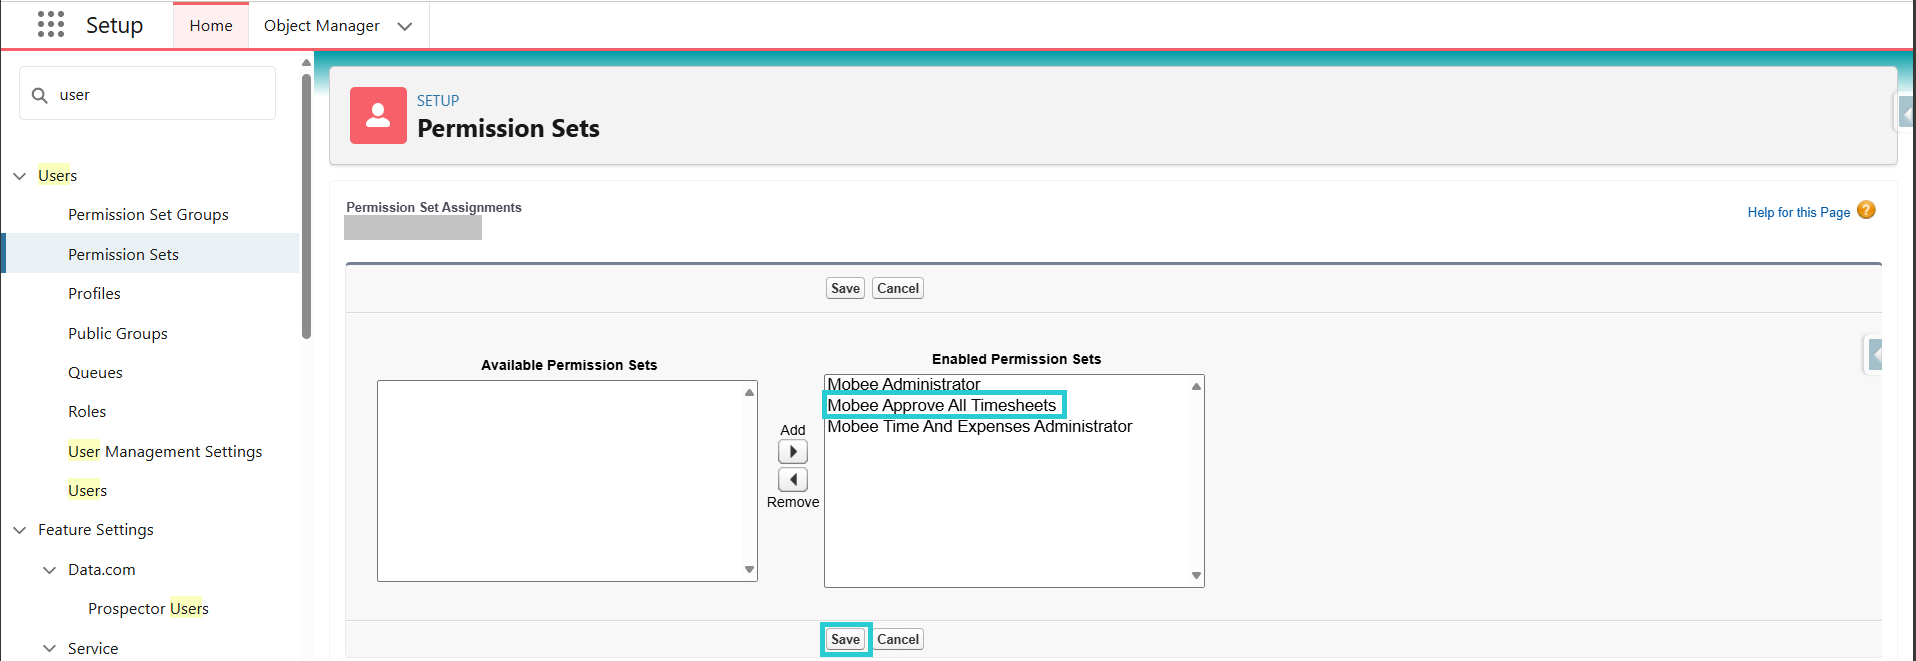
3.2. Permission Set Assignment
In Setup > Users, set the Mobee Approve All Timesheets permission set on the approver user.


Approval Process Usage
1. Submitter
User submits his time sheet for approval
This action is recallable (1)
Submission comment (2)
Time entries submitted indicator (3)

2. Approver
Assigned approver can approve/reject on submitter's contact
the assigned approver reviews the timesheet (submitted time entries) and has the option to either approve or reject the submission.

Approval Process Behavior And Considerations
- Partial approval is possible
Example A:
the user submits a request for days off, which gets approved. later, they submit their assigned workload for the remaining days


Example B:
the user submits the last days of the month for approval. in the following month, for the same assignment, they submit the remaining weekdays for approval


- When a timesheet is approved, a notification is sent to the submitter
- When a timesheet is rejected, both a notification and an email are sent to the submitter (the email is sent if added according to 2.3. final rejection actions)
- When any pending time entries on a timesheet are rejected, the entire timesheet becomes editable
- Hovering over the following icons
,
and
displays comments from the submitter or approver related to the submission, approval, or rejection, respectively
- The following icons
and
serve as indicators showing the status of the time entry